


Everything you need to know to prevent (and treat) blisters on the trail
Heading out on a big trekking adventure is thrilling – the views, the fresh air, the sense of accomplishment.
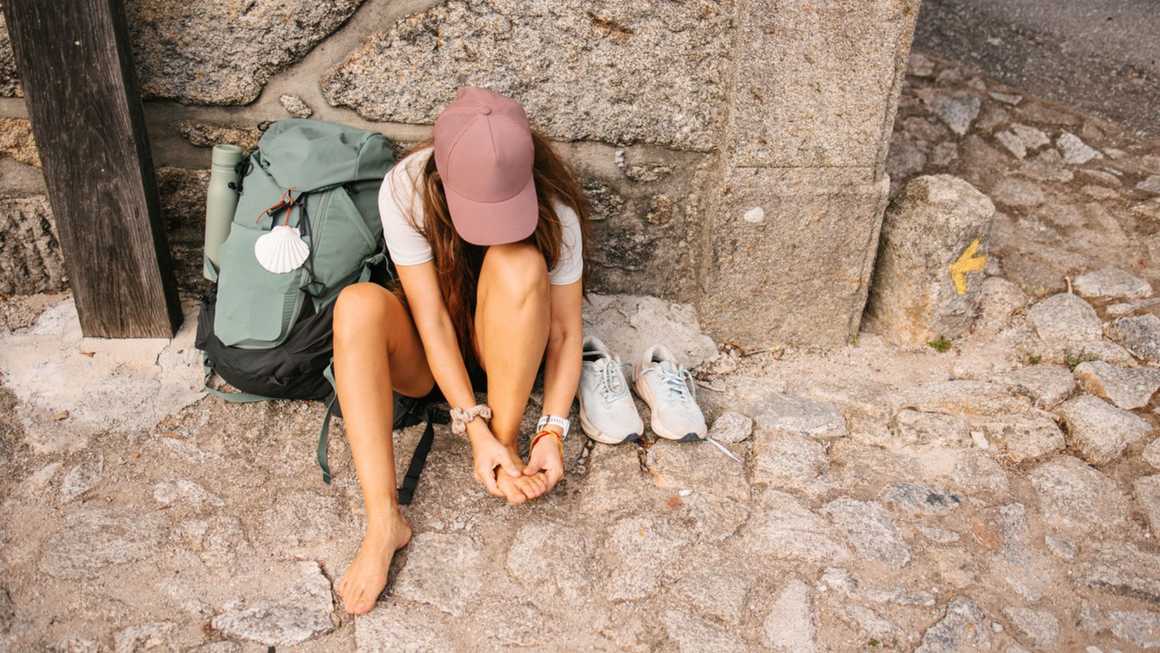
But for many hikers, a common and painful companion threatens to ruin the journey: blisters.
If you’ve ever experienced blisters on the bottom of your feet from walking (or elsewhere on your foot), you’ll know how painful and uncomfortable it can be. Whether you’re preparing your feet before your trek or managing blisters mid-hike, the right knowledge keeps you moving comfortably on your epic adventure.
Here’s Kandoo’s ultimate guide on how to avoid blisters while hiking on the trail – including how to treat blisters on your feet.
Key takeaways
- Blisters form from friction between the skin, not just rubbing from the shoe. Reducing back-and-forth skin movement is key to preventing blistered feet from walking.
- The first few days of a multi-day trek are critical – protect hotspot areas early to avoid blisters later.
- Using the right gear – well-fitted boots, moisture-wicking socks, and targeted blister prevention tools – keeps your feet comfortable and pain-free.
- If blisters do appear, act quickly with clean dressings, blister cream, or medicine for feet to manage pain and prevent infection.
Understanding hiking blisters
Do you want to know what causes blisters on feet when walking? Many people think blisters appear because shoes rub against the skin. In reality, blisters form due to shear forces.
Shear forces are the back-and-forth movement of your skin over the tissues underneath as you walk. On long treks, this repetitive movement can cause tiny tears beneath the skin’s surface. Fluid collects in the tear and a blister develops.
The good news? Blisters are common but not inevitable. Focusing on minimising shear instead of just friction can dramatically reduce your risk.
How to prevent blisters when hiking
Blister risk is highest during the first two to three days of a multi-day hike. Why? Because your feet are still adapting to the constant movement, changing terrain, and the added weight of your pack.
The skin hasn’t toughened up yet. Even small amounts of friction or pressure can quickly lead to hotspots and fluid-filled blisters.
That’s why early prevention is essential in preventing blisters from walking. If you can protect blister-prone areas through those first few days, you’ll massively reduce your chances of developing them later.
Here are a few tips to get through the crucial early stages:
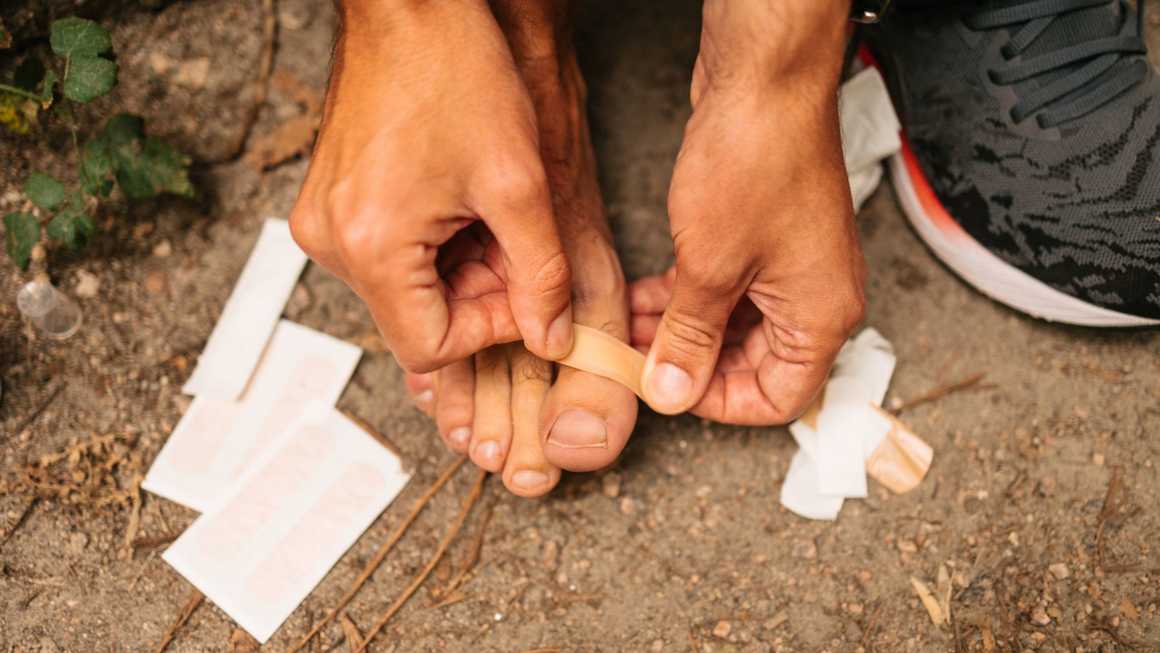
- Pre-tape your known trouble spots. Treat these early with your preferred prevention method, whether it’s tape, protective pads, or gel sleeves. Don’t wait for pain to start.
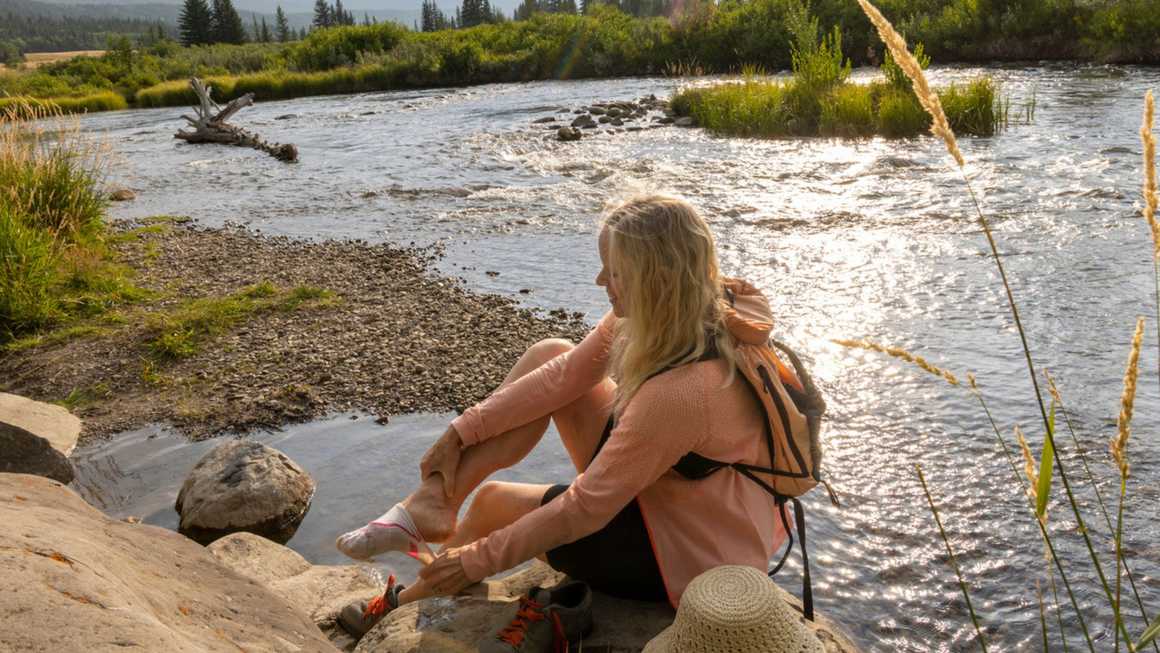
- Check your feet at every break. Look for hotspots or rubbing and deal with them immediately.
- Change socks regularly. Keep your feet as dry as possible, especially in humid or wet conditions. Studies show that hiking with wet socks increases the likelihood of blisters.
- Ease into long distances if you can. A shorter first day helps your feet adapt before the tougher stages begin.
Think of those first few days as the “breaking-in” phase – not just for your boots, but for your feet too. Manage them carefully, and you’ll set yourself up for a comfortable, blister-free trek for the rest of the journey.
Recommended reading: Learn more about other types of trekking injuries and how to avoid them.
4 tips to avoid blisters when hiking, trekking, and walking
Blisters might seem small, but they can turn an amazing day on the trail into an uncomfortable slog. The good news is, they’re completely preventable with the right preparation.
Here are four tried-and-tested tips to help you stay blister-free on your next adventure.
1. Know your feet (and your history)
Every hiker has their weak spots. Maybe it’s the side of your big toe, your heel, or the ball of your foot. Wherever blisters have formed before, that’s where they’ll likely show up again.
Think of your past blisters as a map of “high-risk zones”. Use that map to your advantage:
- Pre-tape vulnerable areas before you start hiking.
- Check your feet regularly during rest stops. Even a slight warm spot can signal a blister forming.
- Moisturise dry skin before your trip. Cracked or rough skin is more likely to blister under friction.
Take the time to understand your own feet – their shape, how they react to long days, and where pressure builds up. The more you know, the better you can protect them.
2. Choose the right blister prevention tools
There’s no single “magic” solution. The key is to match prevention to the specific blister location on your foot:
- Gel toe caps. Great for preventing pinky toe pinch blisters. They absorb shear forces before your skin has to.
- Blister patches. Stick-on pads for high-friction areas like heels or the ball of the foot. Some, like Engo Patches, can last for multiple days.
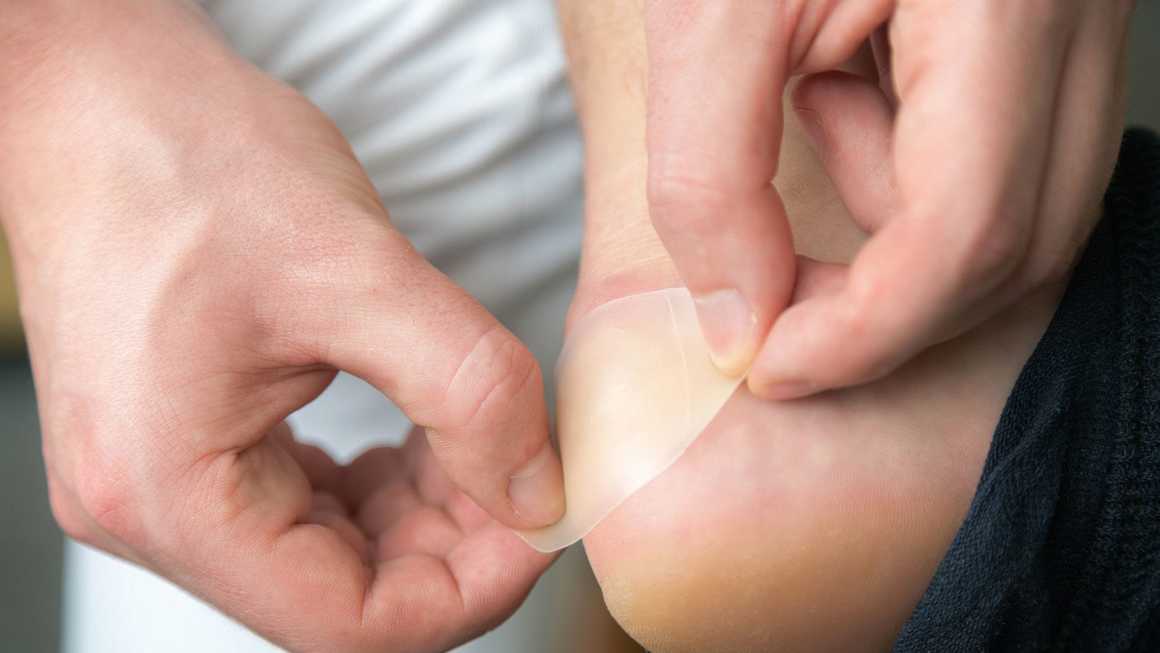
- Hydrocolloid dressings. Ideal for treating blisters mid-hike. Waterproof and sterile, they protect the wound while speeding up healing.
- Regular plasters. A simple but essential item. Ideal for covering early hotspots before they turn into full blisters. Make sure they’re smooth and wrinkle-free, and replace them as soon as they lose adhesion.
And remember: blister prevention starts before you hit the trail. The better your prevention, the less blister treatment you’ll need mid-hike.
3. Wear the right hiking socks
Socks are your first line of defense against blisters. The right pair wicks moisture, regulates temperature, and cushions your feet where it matters most. The wrong pair? That’s a guaranteed shortcut to sore, sweaty blisters.
Look for anti blister walking socks made from technical fabrics that balance softness, breathability, and moisture control. Wool blends (like merino wool) and synthetic performance fibers are your best bet. Avoid cotton — it traps moisture and increases friction.
Here’s what to look for in the best hiking socks to prevent blisters:
- Moisture-wicking materials. Keep feet dry by pulling sweat away from the skin. Fabrics like merino wool, Coolmax, or nylon help prevent the soft, damp skin that leads to blisters. Always pack spare pairs for long or humid treks.
- Snug fit (but not tight). Socks should hug your foot without squeezing. Loose socks wrinkle and rub, while tight ones restrict circulation. Make sure the heel stays in place and there’s no bunching under the arch.
- Reinforced padding. Cushioning in high-impact zones (heels, toes, and the ball of the foot) reduces friction and absorbs shock. Choose zoned padding for protection without trapping heat.
- Seamless design. Flat or seamless toes eliminate raised edges that cause rubbing. Especially useful if your boots have a snug toe box or you’re hiking long distances.
And here are some top picks for the best anti blister hiking socks:
- Darn Tough Hiker Micro Crew Socks – durable, breathable, and backed by a lifetime guarantee.
- Smartwool Hike Classic Socks – soft merino wool blend that naturally regulates temperature.
- Injinji Toe Socks – great for preventing blisters between the toes on long treks.
- Bridgedale Trekker Socks – excellent cushioning and moisture control for multi-day hikes.
Top tip: Always test your socks with your hiking boots before a big trip. Even the best gear won’t help if it doesn’t suit your feet.
4. Buy the right boots for trekking
Your boots are the foundation of your hiking experience and the biggest factor in blister prevention. Ill-fitting boots, stiff materials, or worn-out insoles can create pressure points that turn into painful blisters fast.
When shopping for trekking boots:
- Prioritise fit above all else. Your boots should feel snug but not tight, with enough room to wiggle your toes.
- Break them in properly. Don’t make your first multi-day trek the first time you wear them. Start with short walks and gradually increase the distance to let the materials soften and mold to your feet.
- Match your boots to your terrain. Lightweight hiking shoes might work for dry trails, but for steep, rocky, or wet routes, opt for sturdy trekking boots with good ankle support.
- Pay attention to your insoles. Custom or upgraded insoles can make a huge difference in support and pressure distribution, especially if you have high arches or flat feet.
A well-fitted pair of boots, combined with moisture-wicking socks and smart prevention tools, will take you from the first step to the summit without pain or distraction.
Find out more about the top hiking boots and best walking socks to prevent blisters in our essential trekking gear guide.
How to deal with blisters while hiking
Following the above tips should set you up to avoid painful blisters altogether. But if the unthinkable happens, how do you relieve the pain when you’re on the trail?
Here’s how to manage blisters on the trail:
Act fast at the first sign of discomfort
Stop as soon as you feel rubbing or a hotspot. Remove your boots and socks, dry the area, and apply a plaster, tape, or blister patch before the skin breaks.
Clean the area carefully
If a blister has already formed, gently clean it with sterile water or antiseptic wipes to prevent infection.
Protect and cushion the blister
Cover the blister with a hydrocolloid dressing or blister plaster. If the blister is still intact, pad around it rather than directly on top to reduce pressure.
Use blister medicine for feet if needed
Specialised blister cream for feet can help soothe pain, prevent infection, and promote healing. Apply only to clean skin and follow up with a sterile dressing.
Drain only if necessary
If it’s too painful to walk, use a sterilised needle to drain from the side (never from the top), then cover immediately with a sterile dressing to prevent infection.
Keep the area dry and secure
Change socks regularly, check your dressings during breaks, and let your feet air out when resting.
Top tip: Pre-pack a blister kit for hiking inside your first aid bag. Include hydrocolloid dressings, antiseptic wipes, tape, and a spare pair of dry socks. A quick stop to treat a hotspot early can save you a lot of pain later in the trek.
How to treat different types of blisters
Not all blisters are the same, and how you treat them depends on their condition. Knowing the difference helps you protect your skin, prevent infection, and get back on your feet faster.
Take a look at how to handle each type of blister:
Intact roof – leave it alone
The skin on top acts as a natural barrier against infection. Simply protect it with a clean dressing or blister plaster and keep it dry.
Partially torn – cover it
If part of the blister roof has lifted but not completely come off, cover it gently with a hydrocolloid dressing and avoid direct pressure. This helps seal the area and speeds up healing.
Deroofed (skin fully removed) – clean it
Keep the area clean and sterile. Apply an antiseptic and cover it with a non-stick or hydrocolloid dressing to protect from friction and infection while it heals.
FAQs about how to prevent blisters while hiking
Do you still have some burning questions about how to stop blisters when hiking? Here are the answers to some of our most commonly-asked questions about blisters when walking.
How do you prevent blisters on the bottom of your feet from walking?
The key to preventing painful blisters is reducing friction and shear. Start with well-fitted boots and moisture-wicking socks, and pay attention to areas that tend to get hotspots.
Cover high-friction spots with blister patches or gel pads, keep your feet dry, swap damp socks when needed. Make sure to break in your boots gradually before going on a multi-day expedition, like The Inca Trail or Everest Base Camp trek.
Should you pop a blister?
Generally, no. Intact blisters protect against infection. Only drain a blister if it’s extremely painful, using a sterilised needle from the side, never the top. Then, cover it immediately with a sterile dressing.
How to hike with blisters?
Walking on blistered feet isn’t ideal, but it’s manageable. Protect the blister with a hydrocolloid dressing or padding, wear cushioned socks, and reduce friction. Take breaks, adjust footwear, and avoid putting direct pressure on the blister to prevent worsening the injury.
How to heal blisters on feet overnight?
Unfortunately there’s no overnight remedy to cure blisters on your feet. However, there are some ways to speed up the process and relieve some discomfort.
Clean and dry the area, then apply a sterile hydrocolloid dressing or blister plaster. Keep it protected and cushioned while resting. Avoid pressure or friction, and let your feet air when possible. Overnight hydration and care speed up healing, reducing pain for the next day’s hike.
Do callouses stop blisters?
Unfortunately not. While callouses may seem protective, they don’t stop blisters. They’re simply a sign that your skin experiences repetitive shear. In fact, hardened skin can sometimes make blister care more difficult because it’s less flexible. As a result, the skin can trap pressure underneath, increasing the risk of painful hotspots.
Treat calloused areas like any other high-friction spot: protect them with patches, padding, or gel before you start hiking.
Step onto the trail with confidence
Blisters don’t have to ruin your adventure. Understanding the true causes, taking preventive action, and knowing how to manage them on the go ensures your feet stay comfortable and healthy.
With the right preparation, multi-day hikes can be all about the views and the journey, not painful toes.
Ready to focus on the adventure, not your feet? Join a Kandoo adventure and let our expert team handle the logistics, local insights, and safety while you enjoy every step – blister-free!